This past year Southern Accents built a couple of giant chalk boards for the Southern Makers event. Event goers were asked to chalk their answer to the question, “What Inspires You?” on the boards. The idea was such a huge hit that we constructed a second large chalkboard for the social media conference, Haven, in Atlanta. Each blogger attending the conference was asked to autograph our board. We have found a bounty of uses for these versatile boards and decided to share how we create our boards and frame them with salvaged materials.
Our resident artisan Roger Long happily demonstrated the steps by creating a small chalkboard in our wood shop. Using 1/4″ multi density fiber board, Roger cut an 8″ x 10″ board using a table saw. The fiber board is inexpensive, provides a smooth surface, and can be picked up at your local hardware store.

Spray chalk paint was used to coat the smooth side of an 8″ x 10″ piece of fiber board.
The smooth side of the board was painted using black chalk paint. The best method to use for a small board is spray paint. Larger boards can be painted using a smooth roller. Once dry, a steel wool pad was used to lightly sand over the first coat. The board was wiped clean with mineral spirits to remove dust particles and was given a second coat of paint. The board was then set aside until completely dry.

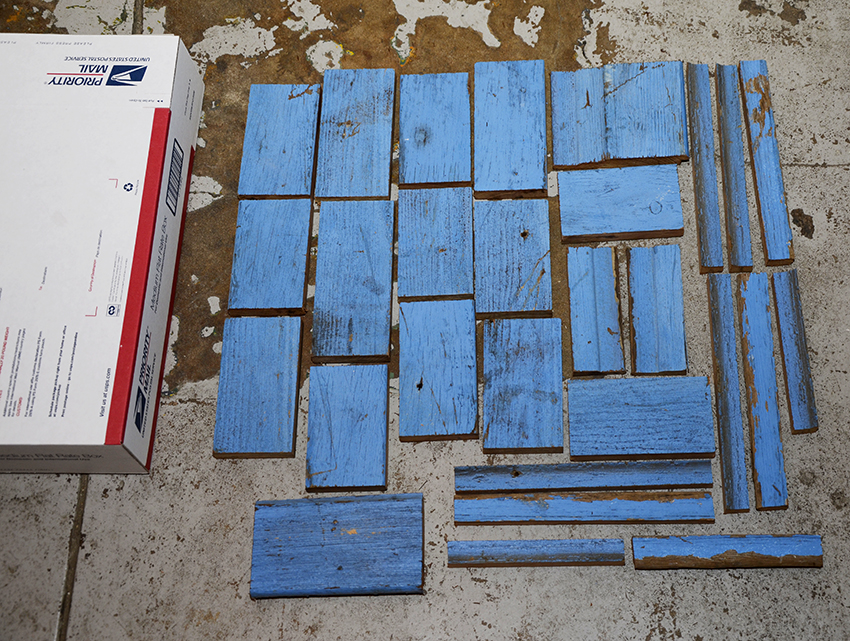
Roger Long cutting the salvaged wood boards to create the chalk board frame.
To frame our board we chose some gorgeous pieces of red barn wood from our salvaged wood warehouse. These pieces originally had a tongue and groove, which gave the inside of our frame a natural lip to hold and attach the chalkboard. If using solid pieces of wood a router could be used to create the needed grooves. Another option is to cut the fiber board larger than the inside measurement of your frame and attach it directly to the back of the frame using small tacks or staples.

Tongue and groove boards were cut and the edges mitered for use in framing our chalk board.
The wood pieces were cut to a common width and then cut to the required lengths to frame the 8″ x 10″ chalk board. If mitering the corners, extra length must be added to each side to accommodate the mitered edges. There are many great tutorials online that give step-by-step instructions on how to properly miter the edges. Roger is a pro so the corners of our frame looked fabulous when finished. Another option is to create a solid edge frame. This eliminates the need for mitered edges and creates a more rustic looking frame for the chalkboard.

Wood glue was used in the frame assembly.
Once our pieces were cut, Roger laid them on the work table to ensure that they fit together properly. To assemble the frame he used a combination of wood glue and corrugated staples. The wood we chose for our frame was heavy so the corners were screwed together to reinforce the frame.

After the pieces were glued, corrugated staples were also used to secure the corners.

Screws were used in all corners to help secure our wood frame.
Because the wood had to be trimmed to a common width, the outside edge of our frame was raw. Using an extra piece of the red salvaged wood, Roger cut pieces of trim that he attached to the raw edges using wood glue and small staples. This gave the frame a very nice finished look.

Wood trim was cut and attached to the raw edges using wood glue and small staples.

Roger lightly sanded the trim at each corner, giving the frame a nice polished look.
Once the frame assembly was complete and the glue given time to dry, the chalk board was attached and secured to the inside grooves with small tacks. Roger chose to use two small eye screws and wire to create a hanger for the board. The finished result was beautiful! There is something about old red barn wood that is simply irresistible!

Small eye screws and wire were used to create a hanger.

The chalk board was attached to the inside grooves of the frame using small tacks
We realize that not everyone has access to a wood shop and all the right tools. Our goal is to demonstrate how salvaged items can be turned in to beautiful works of art and useful items. Our hope is that our projects will both encourage and inspire!

The finished chalk board!

One of our salvaged wood frame chalk boards used at a wedding this past summer.
Written by: Lisa Jones
Southern Accents Webmaster/Marketing
34.175601
-86.840585